How to Extract a Tooth at Home?
You’re considering extracting a tooth at home, a challenging task that warrants careful preparation and understanding of the risks involved. It’s important you assess the severity of your condition and exhaust all other options before proceeding. You’ll need to gather sterilized tools and make sure you’re equipped to manage pain and potential complications. While the process might seem straightforward, improper technique can lead to serious health issues.
Next, we’ll explore how to correctly perform the extraction, but remember, knowing when to seek professional help could be the difference between a quick recovery and severe complications.
Assessing the Need for Extraction

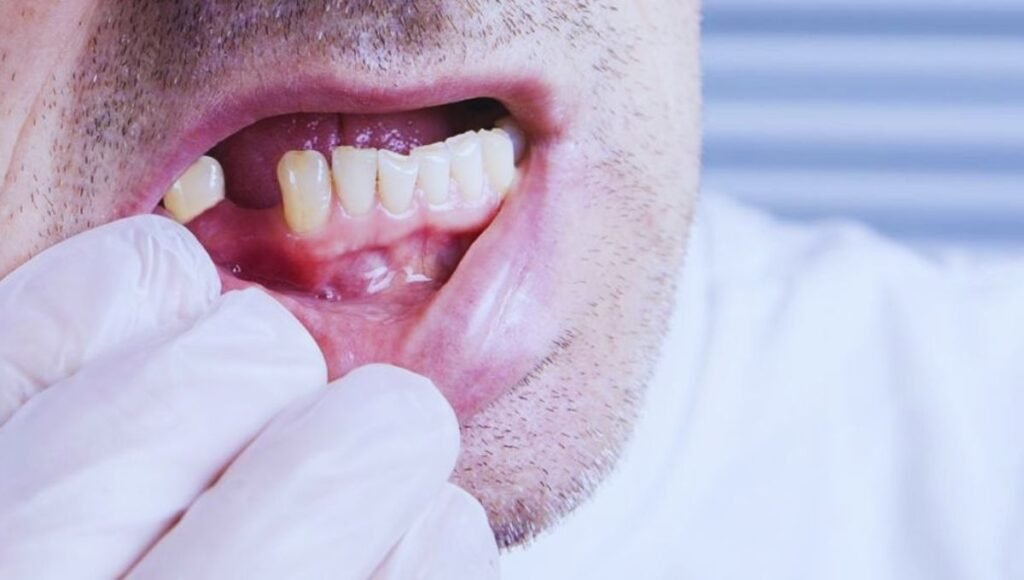
Before considering tooth extraction at home, it’s important to accurately assess whether the procedure is necessary and safe for your specific situation. Start by conducting a thorough tooth condition assessment. Examine the affected tooth and surrounding gum area for signs of infection, decay, or damage. Are you experiencing severe pain, swelling, or mobility in the tooth? These symptoms may indicate a need for extraction, but determining the exact condition requires professional expertise.
It’s essential to understand the self-extraction risks associated with DIY tooth removal. Improper technique can lead to significant complications, including infection, prolonged bleeding, or damage to neighboring teeth and nerves. These risks highlight why professional consultation is indispensable. A dentist can provide a detailed evaluation using appropriate diagnostic tools, such as X-rays, to visualize the root structure and bone integrity. This step is crucial to ascertain if an extraction is indeed the best course of action or if alternative treatments could resolve the issue more safely.
You should weigh these factors carefully. If the risks of home extraction seem overwhelming or if the assessment raises doubts, seeking professional help is the prudent choice. Prioritizing your health and safety is paramount in these decisions.
Preparing for the Procedure
Once you’ve decided to proceed with a tooth removal, assembling the necessary medical supplies is your first essential step. However, beyond the tangible tools, preparing yourself mentally and physically is equally vital. Mental preparation and physical readiness can greatly influence the outcome of your at-home procedure.
Here are essential steps to make sure you’re fully prepared:
- Mental Preparation:
Understand the procedure thoroughly. Research the steps involved and possible complications. This knowledge will help manage anxiety and set realistic expectations.
- Physical Readiness:
Ensure you’re in good health before attempting the extraction. Eat a light meal a couple of hours before to maintain your blood sugar levels, which can aid in managing pain and stress.
- Emotional Support and Relaxation Techniques:
Have someone you trust to be with you during the procedure. Their presence can provide emotional support and assist if an unexpected situation arises. Additionally, practice relaxation techniques such as deep breathing or meditation beforehand to help calm your nerves.
Gathering Necessary Tools
To successfully extract a tooth at home, you must first gather all the necessary medical tools and verify they’re sterilized to prevent infection. This step is essential in guaranteeing the safety of the DIY extraction process. Start by assembling sterile gloves, cotton gauze, a small dental mirror, a pair of sterilized dental forceps, and antiseptic mouthwash. You’ll also need pain relief medication to manage discomfort post-extraction.
Sterilization of your home tools is paramount to avoid introducing bacteria into the wound. Use an autoclave if available, or boil the tools for at least 20 minutes in distilled water. After boiling, let them air dry on a clean, dry towel in an area free from contaminants.
If you don’t have access to an autoclave or suitable boiling facilities, consider using chemical sterilants such as ethylene oxide or a glutaraldehyde-based solution. Follow the manufacturer’s instructions precisely to guarantee effective sterilization.
Performing the Extraction
Make certain you have a clear view of the tooth using the dental mirror before attempting to grip it with the sterilized dental forceps. Once you’ve confirmed the target tooth is accessible, carefully use the forceps to grasp the tooth as close to the root as possible. It’s vital to apply steady, gentle pressure; avoid jerking movements which can lead to complications.
Given the risks involved, including potential damage to surrounding teeth and tissues, and the possibility of infection, it’s significant to explore alternative options. Consulting a professional dentist is highly recommended, as they can provide safe and effective solutions.
If proceeding at home, make sure you’re fully informed about the following steps:
- Positioning: Align the forceps perpendicular to the tooth. This maximizes control and minimizes undue pressure on adjacent teeth.
- Extraction Technique: Rotate the tooth slowly, pulling straight up with a firm, steady grip. Avoid twisting excessively to reduce the risk of breaking the tooth.
- Immediate Follow-Up: Check the socket for any remnants of the tooth root or debris. Any remaining fragments can lead to complications and should be addressed by a healthcare provider.
Managing Pain and Bleeding

After you’ve removed the tooth, it’s essential to manage your pain and control the bleeding effectively.
You’ll need to apply sterile gauze to the extraction site and maintain pressure to facilitate clot formation, reducing hemorrhage.
For pain relief, consider over-the-counter analgesics like ibuprofen or acetaminophen, following the dosages precisely to avoid complications.
Pain Relief Options
When managing pain and bleeding after tooth extraction, it’s crucial to apply cold compresses intermittently and take prescribed analgesics as per your dentist’s instructions. Additionally, you can explore some home remedies and natural alternatives to enhance your comfort during recovery.
- Cold Compresses:
Apply a cold compress to the cheek near the extraction site for 10 minutes on, then 10 minutes off. This helps reduce swelling and numbs the area, easing pain. Make sure the compress is wrapped in a cloth to avoid skin damage.
- Natural Pain Relievers:
Consider using clove oil, a natural analgesic, which you can apply directly to the extraction site or soak a small cotton ball and place it over the area. Another option is a saltwater rinse, which can soothe the gum and promote healing. Mix one teaspoon of salt in a cup of warm water and gently swish around your mouth for 30 seconds before spitting it out.
- Herbal Teas:
Drinking warm herbal teas such as chamomile can be soothing. Chamomile has anti-inflammatory properties that help reduce swelling and discomfort. Steer clear of excessively hot liquids as they can worsen bleeding.
Controlling Bleeding Techniques
To effectively control bleeding post-tooth extraction, applying firm pressure to the site using a clean gauze pad for about 10-15 minutes is vital. This method, known as direct pressure, is a fundamental first aid technique for bleeding control. It helps in clot formation by minimizing blood flow, allowing the body’s natural healing mechanisms to activate.
If bleeding persists, replace the gauze pad and continue to apply pressure. Ensure the pad is adequately damp with saline solution to maintain the moisture essential for clot stability. Avoid frequent checking or removal of the pad, as this might disrupt clot formation and exacerbate bleeding.
In some cases, elevating your head above the heart level can aid in reducing the blood flow to the area, further promoting clotting. It’s important to remain calm and avoid any strenuous activities as your heart rate can increase blood flow, making bleeding control more challenging.
Aftercare and Comfort Tips
Once you’ve managed initial bleeding, focus on maintaining comfort and controlling pain as part of your aftercare routine. Effectively managing these aspects is essential to guarantee a smooth recovery process. Here are some key strategies you should follow:
- Implement Pain Management Techniques:
- Take over-the-counter pain relievers such as ibuprofen or acetaminophen according to the package instructions. These medications not only alleviate pain but also help in reducing inflammation.
- If pain persists or escalates, consult with a healthcare provider for potential prescription pain management options.
- Apply Cold Compresses:
- For the first 24 hours post-extraction, periodically apply a cold compress to the cheek adjacent to the extraction site. This helps to reduce swelling and numbs the area, providing temporary pain relief.
- Limit each application to 10-15 minutes to prevent skin damage.
- Maintain Oral Hygiene with Caution:
- Rinse your mouth gently with a saline solution or mild antiseptic rinse to prevent infection. Avoid vigorous rinsing or spitting to not disturb the blood clot that forms in the extraction site.
- Brush and floss your teeth as usual but steer clear of the extraction site to avoid irritation.
Aftercare and Monitoring
After you’ve extracted a tooth, it’s important to follow strict aftercare protocols to guarantee proper healing and prevent complications.
You’ll need to monitor the extraction site closely for signs of infection, such as increased pain, swelling, or pus discharge.
Adhere to post-extraction healing tips, including maintaining oral hygiene and avoiding strenuous activities that could disrupt the clot formation.
Post-Extraction Healing Tips
While you monitor the healing process, it’s crucial to keep the extraction site clean to prevent infection. Here’s a guide to ensure effective aftercare and monitor the recovery:
- Follow a strict oral hygiene routine:
- Rinse gently with saline solution or an antiseptic rinse recommended by your dentist, especially after meals to remove debris and reduce the risk of infection. Avoid vigorous rinsing to prevent dislodging the blood clot from the socket.
- Adhere to dietary restrictions and the healing timeline:
- For the first 24 to 48 hours, consume only soft foods such as yogurt, applesauce, and soup. Gradually reintroduce semi-soft foods as your healing progresses. Chewing hard or crunchy foods can disrupt the clot and slow the healing process.
- Prevent dry socket:
- Avoid smoking, using straws, or any sucking actions that might dislodge the blood clot at the extraction site. Dry socket is a painful condition where the protective blood clot is lost too early, exposing nerves and bones.
Monitoring these aspects diligently will promote healing and help you avoid complications. Remember, each person’s recovery may vary, and following these guidelines will aid in a smoother, more effective healing process.
Monitoring Signs of Infection
Monitoring for signs of infection is pivotal as you manage your recovery and ensure the extraction site heals properly. Infection prevention hinges on meticulous wound care and early detection. Keep a close eye on the wound for any unusual changes.
Here’s a detailed table to help you systematically monitor signs of potential infection:
| Sign | Action |
|---|---|
| Increased Pain | If pain intensifies post-day 3, contact a professional. |
| Abnormal Swelling | Swelling should decrease after 48 hours; if it persists or worsens, seek medical advice. |
| Pus or Oozing | Presence of pus indicates infection; consult a doctor immediately. |
Swelling monitoring is essential to your aftercare routine. The first 24-48 hours post-extraction might show normal swelling, but continuous observation is key. If swelling doesn’t subside or if it reappears after initially decreasing, this could indicate an infection.
Frequently Asked Questions
Can I Extract Someone Else’s Tooth at Home?
You shouldn’t perform DIY dentistry due to ethical concerns and potential risks. Complications can arise without proper training. It’s crucial to consult a professional for safe, medically sound procedures.
Will Dental Insurance Cover Home Tooth Extractions?
Dental insurance typically doesn’t cover home tooth extractions due to safety risks. It’s important to seek professional care to avoid complications. Review your policy for specifics on coverage and approved dental procedures.
How Do I Dispose of the Extracted Tooth?
To dispose of an extracted tooth, consider its environmental impact. You can place it in a biohazard container or return it to your dentist for proper disposal, ensuring compliance with medical waste regulations.
Are There Legal Issues With Extracting Teeth at Home?
Yes, there are legal implications and safety concerns with performing dental procedures at home. You should consult a professional to avoid complications and guarantee compliance with health regulations.
Can I Drink Alcohol After Extracting a Tooth?
You shouldn’t consume alcohol after tooth extraction as it can hinder your healing process and disrupt pain management. Alcohol may increase bleeding and delay recovery, compromising the overall success of the healing period.
Conclusion
Finally, only consider extracting a tooth at home as a final option, making sure you’ve assessed the necessity thoroughly.
Prepare by sterilizing all tools and numbing the area effectively.
During extraction, apply steady pressure and manage bleeding meticulously with sterile gauze and saline.
Afterward, diligently monitor for signs of infection and adhere to strict aftercare protocols.
If any complications arise, seek professional assistance immediately to mitigate risks and promote proper healing.


